Guide to Jupyter and Jupyter Notebooks
Jupyter is an open-source project that lets you write and run code interactively inside documents called notebooks. A notebook combines code, its output, explanatory text, and visualizations all in one place, making it an excellent tool for learning, data analysis, scientific computing, and sharing your work with others.
Elara uses Jupyter alot in this project, so this guide will walk you through everything you need to get started.
What is a Jupyter Notebook?
A Jupyter Notebook is a document made up of cells, each of which can contain either code or text. You run cells one at a time and the output appears directly below each cell. This makes it easy to experiment and see results immediately, without having to run an entire script from scratch.
Notebooks are saved as .ipynb files (short for IPython Notebook), which store your code, outputs, and text all together.
Installation
The easiest way to get started is to install all project dependencies at once from our requirements.txt:
pip install -r requirements.txtThis installs everything the project uses, including jupyter-book, which is the tool we use to build this handbook from notebooks. If you only want to install Jupyter on its own without the rest of the project dependencies:
pip install notebook jupyterlabTo verify the installation worked:
jupyter --versionStarting Jupyter
There are two interfaces you can use: Jupyter Notebook and JupyterLab. Both are launched from the command line inside your project directory.
To start Jupyter Notebook:
jupyter notebookTo start JupyterLab:
jupyter labEither command will open a new tab in your browser. The server runs locally on your machine, so no internet connection is required.
Jupyter Notebook Interface
The Dashboard
When Jupyter Notebook starts, it opens to the dashboard, which a file browser showing the contents of the directory you launched it from. From here you can open existing notebooks, navigate folders, and create new files.
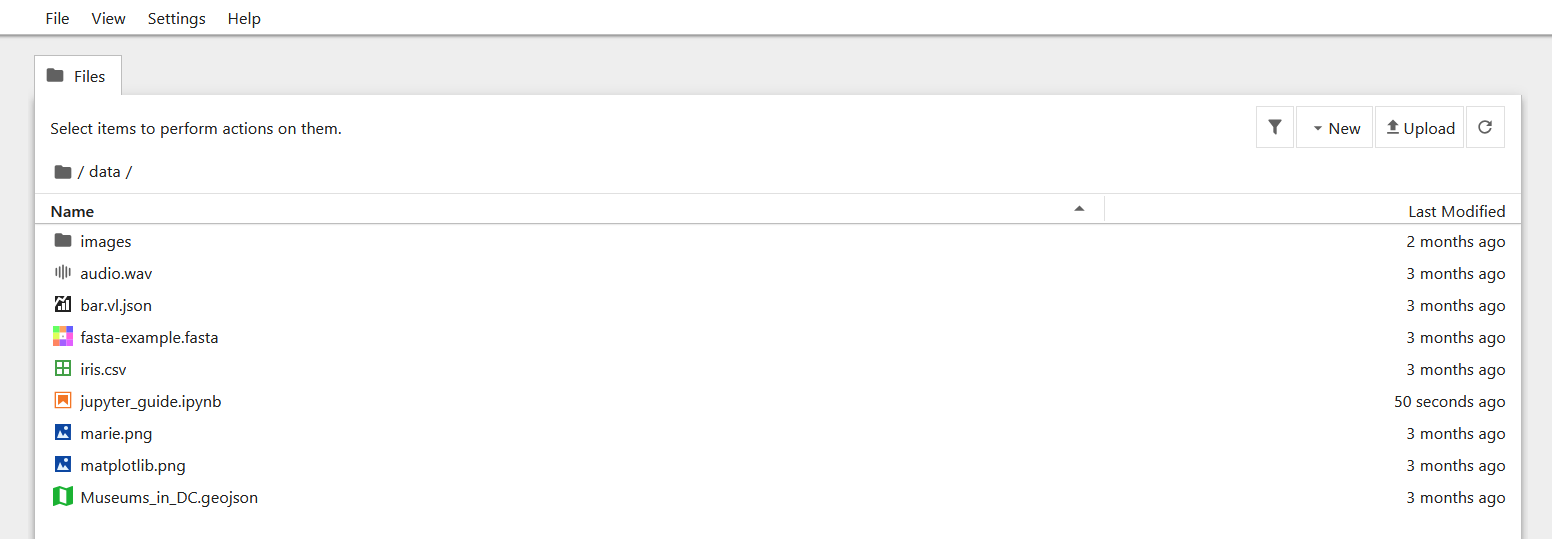
To create a new notebook, click the New button in the top-right corner and select a kernel.
Inside a Notebook
Once a notebook is open, you will see the toolbar at the top and a series of cells below it.

The toolbar contains buttons for the most common actions:
Save — saves the notebook
Add cell — inserts a new cell below
Run — runs the currently selected cell
Kernel menu — restart or interrupt the kernel
Cell Types
There are three types of cells:
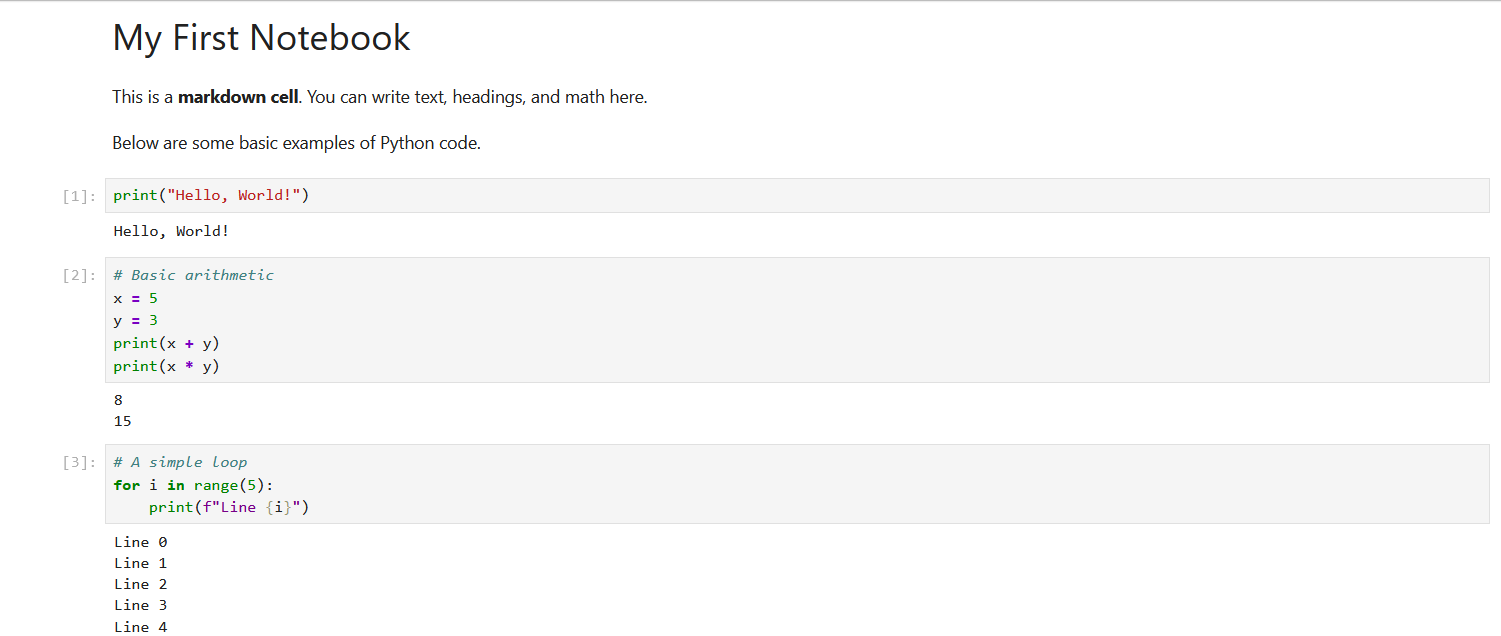
Code cells — contain Python (or other language) code. When run, their output appears directly below.
Markdown cells — contain formatted text written in Markdown. When run, the raw text is rendered into headings, bold text, lists, equations, etc.
Raw cells — contain plain text that is not run or rendered. You can change a cell’s type using the dropdown in the toolbar, which shows Code, Markdown, or Raw.
Running Cells
To run a cell, select it and either:
Press Shift + Enter — runs the cell and moves to the next one
Press Ctrl + Enter — runs the cell and stays on it
Click the Run button in the toolbar Code cells show their output (printed text, plots, errors, etc.) directly below after running. Markdown cells render their formatted text.
# Example code cell
x = 5
y = 10
print(x + y)
The output 15 will appear below this cell after running it.
Saving and Exporting
Jupyter autosaves your notebook periodically, but you can save manually with Ctrl + S or the save button in the toolbar.
To export your notebook to another format (HTML, PDF, plain Python script, etc.), go to File → Download as and choose a format. Exporting to HTML is a good way to share a readable version of your notebook with someone who does not have Jupyter installed.
JupyterLab Interface
JupyterLab is a more advanced interface built on the same technology as Jupyter Notebook. It replaces the simple dashboard with a flexible, multi panel workspace, where you can have notebooks, terminals, text editors, and the file browser all open side by side.
Key differences from Jupyter Notebook:
Left sidebar — contains the file browser, running kernels, and extension manager
Launcher tab — shown when no file is open, lets you create new notebooks, terminals, or text files
Multiple tabs — notebooks, terminals, and files open as tabs in the main area and can be dragged to split the view JupyterLab and Jupyter Notebook use the same
.ipynbfiles and the same keyboard shortcuts, so everything above applies to both.
Working with the Kernel
The kernel is the computational engine that runs your code. Each notebook has its own kernel, which maintains the state of all variables and imports for the duration of your session.
Some important things to know:
Cells can be run in any order, but the kernel remembers the order they were actually run. The number in brackets next to each cell (e.g
[3]) shows the execution order.If your kernel becomes unresponsive or you want to start fresh, go to Kernel → Restart & Clear Output.
Restarting the kernel clears all variables from memory. You will need to re-run your cells from the top.
Online Alternatives
If you do not want to install Jupyter locally, or need more computational power, there are several online platforms that support Jupyter notebooks.
Google Colab
Google Colab is a free cloud-based notebook environment provided by Google. It requires no installation. You sign in with a Google account and start writing code in your browser immediately. Colab notebooks are stored in Google Drive and can be shared like any other Drive file.
Google Colab is the recommended option for computationally heavy tasks such as physics simulations, machine learning, or anything that would be slow on a personal laptop. Colab provides free access to GPUs and TPUs which can dramatically speed up these workloads.
Binder
Binder lets you turn any public Git repository into a live, runnable notebook environment with no setup. You paste a link to your repository and Binder builds a temporary environment with all required dependencies installed. It is a good way to share a notebook with someone who wants to run it without installing anything locally.
Note that Binder environments are temporary, any changes you make are not saved once the session ends.
nbviewer
nbviewer renders .ipynb files as static, readable web pages. You paste a link to any publicly hosted notebook (for example on GitHub or Codeberg) and nbviewer displays it with all outputs visible, without needing to run anything. It is useful for sharing or previewing a notebook that does not need to be interactive.